
Best VPN Proxy Services for Skype to Buy in November 2025

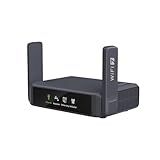
GL.iNet GL-MT300N-V2 (Mango) Portable Mini Travel Wireless Pocket VPN WiFi Router - 2X Ethernet Ports | USB 2.0 | OpenWrt | OpenVPN/Wireguard for Public & Hotel Wi-Fi | Easy to Set up via Admin Panel
-
SECURE WI-FI: TURN PUBLIC NETWORKS INTO PRIVATE, SECURE CONNECTIONS.
-
PORTABLE DESIGN: WEIGHING JUST 39G, IT FITS EASILY IN YOUR POCKET!
-
EASY SETUP: QUICK CONFIGURATION VIA MOBILE APP OR WEB ADMIN PANEL.


VPN Pro: Super VPN Fast Proxy Servers
- ACCESS 20+ FAST SERVICES WITH UNLIMITED DATA AND HIGH-SPEED SERVERS!
- ENJOY SECURE VPN WITH ONE-CLICK ACCESS-NO SIGN-UP REQUIRED!
- USER-FRIENDLY INTERFACE LETS YOU CONNECT GLOBALLY WITH EASE!

Turbo VPN Pro - A Fast, Secure & Unlimited VPN Proxy
- ENJOY LIGHTNING-FAST SPEEDS WITH OUR EXTENSIVE SERVER NETWORK!
- BROWSE SECURELY WITH OUR STRICT NO-LOGGING POLICY GUARANTEE.
- EASILY SELECT THE BEST SERVER FOR YOUR NEEDS WITH SMART FEATURES!
GL.iNet GL-BE3600 (Slate 7) Portable Travel Router, Pocket Dual-Band Wi-Fi 7, 2.5G Router, Portable VPN Routers WiFi for Travel, Public Computer Routers, Business Trip, Moblie/RV/Cruise/Plane
-
DUAL BAND SPEED UP TO 2882MBPS: EXPERIENCE LIGHTNING-FAST INTERNET.
-
USER-FRIENDLY TOUCHSCREEN CONTROL: EASILY MANAGE AND MONITOR YOUR NETWORK.
-
ADVANCED VPN CAPABILITIES: SECURE YOUR CONNECTION WITH BUILT-IN VPN OPTIONS.

GL.iNet MT2500A (Brume 2) Mini VPN Security Gateway for Home Office and Remote Work-VPN Server&Client for Home and Office, VPN Cascading, Internet Security, 2.5G WAN, *NO Wi-Fi* (Aluminium Alloy Case)
-
LIGHTNING-FAST SPEEDS: ENJOY UP TO 355 MBPS WITH WIREGUARD VPN.
-
ROBUST NETWORK SECURITY: PROTECT PRIVACY WITH CLOUDFLARE ENCRYPTION.
-
DUAL FUNCTIONALITY: USE VPN SERVER & CLIENT SIMULTANEOUSLY FOR FLEXIBILITY.
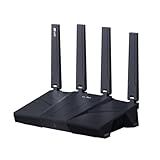
GL.iNet GL-BE9300 (Flint 3) Tri-Band WiFi 7 Router, High-Speed 6GHz Gaming WiFi Router for Wireless Internet, Long Range, 5 x 2.5G VPN Routers for Fiber Optic Modem, Computer Routers, Home & Business
- BLAZING FAST SPEEDS: ENJOY UP TO 680MBPS WITH WIREGUARD & OPENVPN!
- AD-FREE BROWSING: CONTROL ADS EFFORTLESSLY WITH ADGUARD HOME SUPPORT.
- CONNECT OVER 100 DEVICES: SEAMLESS PERFORMANCE FOR ALL YOUR DEVICES!

Capri CP-EL128, VPN Server & Travel Router Solution – Secure Home Network Access from Anywhere, Keep Your Home IP Wherever You are, and Enjoy Private, Full VPN Control
-
WORK SECURELY FROM ANYWHERE WITH OUR VPN TRAVEL ROUTER.
-
PROTECT YOUR DATA ON PUBLIC WI-FI WITH END-TO-END ENCRYPTION.
-
ENJOY UNRESTRICTED ACCESS AND CONNECT MULTIPLE DEVICES SEAMLESSLY.
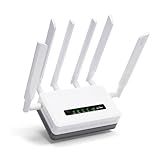
GL.iNet GL-XE3000 (Puli AX) 5G Router with Dual SIM Card Slot, Wi-Fi 6 Cellular Routers, Built-in Battery, Multi-WAN, VPN, OpenWrt, Secure 5G Router for Office, Retail, Events, Business
-
LIGHTNING-FAST 5G CONNECTIVITY: ENJOY BLAZING SPEEDS WITH 5G & DUAL-SIM.
-
UNINTERRUPTED POWER SUPPLY: 6400MAH BATTERY ENSURES 8 HOURS OF ONLINE ACCESS.
-
ROBUST MULTI-WAN SUPPORT: LOAD BALANCING AND FAILOVER FOR VERSATILE CONNECTIVITY.
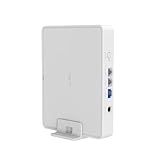
GL.iNet GL-B3000 (Marble) Wireless WiFi 6 Router with Wall-Mountable Photo Frame, Dual-Band AX3000, OpenVPN & WireGuard, Bark & AdGuard Home Parental Controls, OpenWrt, 3 Gigabit Ethernet Ports
-
STYLISH DESIGN & VERSATILE DISPLAY: ENHANCE YOUR DÉCOR EFFORTLESSLY!
-
WI-FI 6 CONNECTIVITY: ULTRA-FAST SPEEDS FOR UNINTERRUPTED STREAMING.
-
ROBUST SECURITY: PROTECT YOUR FAMILY WITH VPN & PARENTAL CONTROLS.

Ultimate VPN - Unlimited Access (NO ADS)
- UNLOCK ANY SITE OR APP WITH SEAMLESS VPN ACCESS ANYTIME.
- EXPERIENCE LIGHTNING-FAST SPEEDS WITH NO THROTTLING, EVER!
- ENJOY TRUE ONLINE PRIVACY-NO LOGS AND DOUBLE ENCRYPTION INCLUDED!
Using a proxy for Skype allows you to bypass certain restrictions and access Skype services from blocked or restricted networks. Here's how you can use a proxy for Skype:
- Find a reliable proxy service: Look for a reputable proxy service provider that offers secure and fast connections. There are both free and paid options available.
- Obtain the proxy server details: Once you have chosen a proxy service, you will typically receive the details of the proxy server. This includes the server IP address or hostname, port number, and any authentication credentials required.
- Configure Skype settings: Open the Skype application on your device and go to the settings or preferences menu. Look for the "Connection options" or "Advanced settings" section.
- Enable proxy settings: In the connection options, locate the proxy settings area. Here, you can specify the proxy server details you obtained earlier. Input the IP address or hostname of the proxy server and the associated port number.
- Add authentication credentials (if required): If your proxy server requires authentication, enter the provided username and password in the appropriate fields. This ensures that Skype can connect to the proxy successfully.
- Test the proxy connection: Save the settings and attempt to connect to Skype. If the proxy configuration was successful, Skype should establish a connection through the proxy server. You can verify the connection by making a test call or sending a message.
Note: It's important to ensure that you are using a reputable proxy service, as some proxies might compromise your privacy or security. Additionally, some institutions or organizations may have policies against using proxies, so make sure you comply with the rules and regulations in your area.
How to enable proxy support for Skype video calls?
To enable proxy support for Skype video calls, follow these steps:
- Open Skype on your device and sign in to your account.
- Go to the "Tools" or "Settings" menu, usually located in the top menu bar.
- In the settings menu, look for the "Connection options" or "Advanced" tab.
- Within the connection options or advanced settings, you should find an option to configure proxy settings. Click on it.
- Enable the proxy support by selecting the appropriate option, such as "Use a proxy server" or "Enable proxy support."
- Enter the proxy server address and port number provided by your network administrator or ISP. You may also need to enter a username and password if your proxy server requires authentication.
- Save the changes and restart Skype for the settings to take effect.
Once you have successfully enabled proxy support for Skype, you should be able to make video calls utilizing the proxy server. Keep in mind that the availability and configuration of proxy settings may vary depending on the version of Skype and the device you are using.
What is the role of a proxy in maintaining online privacy for Skype?
The role of a proxy in maintaining online privacy for Skype is to act as an intermediary between the user and the Skype servers. When a user connects to Skype through a proxy, their internet traffic is routed through the proxy server, which then communicates with the Skype servers on their behalf.
By using a proxy, the user's IP address is masked or concealed. Instead of directly accessing Skype servers, the user's requests are made through the proxy server, which alters the IP address visible to Skype. This helps in preserving the user's anonymity and privacy online.
Additionally, proxies can encrypt the data being transmitted between the user and the proxy server, ensuring that it is not easily interceptable by malicious actors. This helps in safeguarding the confidentiality of conversations and protecting against potential eavesdropping.
Moreover, proxies can sometimes bypass certain restrictions or censorship imposed by ISPs or governments, allowing users to access Skype even if it is blocked in their region.
Overall, the role of a proxy in maintaining online privacy for Skype involves hiding the user's real IP address, encrypting data transmissions, and potentially bypassing restrictions, all in an effort to enhance privacy and security during Skype usage.
How to choose the right proxy authentication method for Skype?
When choosing the right proxy authentication method for Skype, consider the following factors:
- Proxy Server Capability: Check if the proxy server supports authentication and the available authentication methods. Look for compatibility with Skype's requirements.
- Security: Consider the level of security offered by the proxy authentication method. Look for methods that provide strong encryption and secure authentication protocols.
- User Authentication: Evaluate the different authentication methods available that align with your organization's security policies. Common methods include username/password, IP address, or client certificate authentication.
- Ease of Setup and Use: Choose a proxy authentication method that is easy to configure and manage. Consider the effort required to set up and maintain the selected authentication method.
- Compatibility: Ensure the selected proxy authentication method is compatible with your network infrastructure, including firewalls, routers, and other network equipment.
- Performance: Evaluate the impact of the authentication method on the network performance. Some authentication methods may introduce additional overhead, resulting in slower connection speeds.
- Scalability: Consider the scalability of the authentication method. If your organization has multiple Skype users, ensure the selected method can handle the anticipated traffic and user growth.
- Support: Check if the chosen proxy authentication method is well-supported and has resources available in case of any issues or troubleshooting needs.
Ultimately, the choice of proxy authentication method will depend on your specific network environment, security requirements, and organizational preferences. It's recommended to consult with your IT team or network administrators to determine the best option for your Skype usage.
What is the process of setting up a proxy server on Skype for mobile devices?
Setting up a proxy server on Skype for mobile devices involves the following steps:
- Determine the proxy server details: Obtain the proxy server's address and port number. This information is typically provided by the network administrator or the proxy service provider.
- Access network settings: Open the settings menu on your mobile device and find the network settings. On Android, go to "Settings" > "Wi-Fi & internet" or "Connections." On iOS, navigate to "Settings" > "Wi-Fi."
- Configure Wi-Fi settings: Locate and select the Wi-Fi network you are currently connected to. Tap on the network's name to bring up its settings.
- Modify Proxy settings: Look for an option called "Proxy" or "Advanced settings." This will vary depending on your device and Android/iOS version. On Android, tap on "Proxy" and select "Manual." On iOS, tap on the "Manual" option for "HTTP Proxy."
- Enter proxy server details: Input the proxy server address and port number obtained in step 1. In some cases, you may also need to set the proxy type (HTTP, SOCKS, etc.) or additional authentication credentials if required.
- Save the settings: After entering the proxy server details, save the settings by tapping "Save," "Apply," or a similar option. Ensure that the proxy settings are properly configured and enabled.
After completing these steps, your mobile device will route all Skype traffic through the specified proxy server. Note that using a proxy server may impact network performance or cause connectivity issues, so it's recommended to consult with your network administrator or proxy service provider for assistance if needed.
What is the difference between a VPN and a proxy for Skype?
A VPN (Virtual Private Network) and a proxy serve similar purposes of providing anonymity and privacy when using Skype, but they operate in slightly different ways:
- VPN: A VPN encrypts your internet connection and routes it through an intermediary server located in a different region or country. When using Skype through a VPN, your IP address is masked, and your internet traffic is secured and protected from eavesdropping and surveillance. Additionally, a VPN can bypass geo-restrictions and access blocked content, enabling you to use Skype in countries where it may be restricted.
- Proxy: A proxy server acts as an intermediary between your device and the internet. It reroutes your internet traffic through a different IP address, hiding your actual IP. However, unlike a VPN, a proxy does not provide encryption or secure your connection. Proxies are mainly used to bypass network restrictions or access location-specific content by spoofing your location.
In summary, a VPN provides encryption, security, and privacy while using Skype by routing your traffic through secure servers, whereas a proxy primarily masks your IP address and helps circumvent restrictions but lacks encryption and security measures.
How to set up multiple proxy servers for Skype to enhance privacy?
Setting up multiple proxy servers for Skype can help enhance privacy and security. Here are the steps to do it:
- Choose Reliable Proxy Servers: Research and select multiple reliable proxy servers that are known for their privacy features and efficient performance. Ensure they are compatible with Skype.
- Obtain Proxy Server Details: Collect the necessary details for each proxy server, including the IP addresses and the port numbers.
- Configure Proxy Settings in Skype: Open Skype and go to the "Tools" menu. Select "Options" and then click on "Advanced" from the left panel. Under the "Connection" section, choose the "Manual proxy configuration" radio button.
- Add Proxy Server Details: Enter the details of the first proxy server, including the IP address and port number in the provided fields. Enable the proxy server by checking the box next to it.
- Test Proxy Server Connection: Click on the "Test Connection" button to ensure that the proxy server is set up correctly and can be accessed.
- Add Additional Proxy Servers: Repeat steps 4 and 5 for each additional proxy server you want to set up. Ensure that each proxy server is tested successfully before proceeding to the next.
- Configure Proxy Server Order (Optional): By default, Skype uses the proxy servers in the order they are listed. If you want to change their order, click on the "Move Up" or "Move Down" buttons to rearrange them as needed.
- Save Settings and Restart Skype: Once you have added and arranged all the proxy servers, click on the "OK" button to save the changes. Close Skype and restart it for the new proxy configurations to take effect.
With these steps, you should have multiple proxy servers set up for Skype, enhancing your privacy and security while using the application.