
Best Proxies for Firefox to Buy in October 2025

Mastering Proxy Servers: A Comprehensive Guide To Become An Expert In Proxy Servers


Squid Proxy Server 3.1: Beginner's Guide
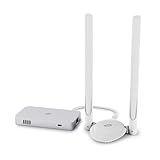
Deeper Connect Mini Decentralized VPN Router Lifetime Free for Travel Home Enterprise-Level Cybersecurity Wi-Fi Router with Dual Antennas Wi-Fi Adapter
-
1 GBPS HIGH-SPEED NETWORKING: FAST AND SECURE FOR ALL YOUR DEVICES.
-
LIFETIME FREE VPN: BROWSE SECURELY WITH NO MONTHLY FEES EVER.
-
USER-FRIENDLY SETUP: EASY PLUG-AND-PLAY INSTALLATION FOR ALL USERS.
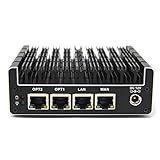
Protectli Vault FW4B - 4 Port, Firewall Micro Appliance/Mini PC - Intel Quad Core, AES-NI, 8GB RAM, 120GB mSATA SSD
- SILENT, COMPACT DESIGN: IDEAL FOR UNOBTRUSIVE NETWORK SECURITY.
- POWERFUL INTEL QUAD CORE CPU: FAST PERFORMANCE WITH AES-NI SUPPORT.
- HASSLE-FREE US SUPPORT & MONEY-BACK GUARANTEE FOR PEACE OF MIND.

Proxy Basics: Learn proxy server for the first time Web system basics (Japanese Edition)

How to make proxy server (Japanese Edition)

Getting Started with Linux Squid Proxy Server Complete Strategy (Japanese Edition)

Microsoft Proxy Server 2 On Site: The Ultimate On-the-Job Solution Finder

VPN Pro: Super VPN Fast Proxy Servers
- QUICK ACCESS WITH 20+ FAST SERVICES AND HIGH-SPEED SERVERS.
- NO SIGN-UP NEEDED; USE PRO VPN IN JUST ONE CLICK!
- FREE, SECURE, AND EASY WORLDWIDE ACCESS WITH UNLIMITED DATA.
Using a proxy in Firefox allows you to route your internet traffic through a different server, providing anonymity and potentially bypassing restrictions. Here's how you can set up and use a proxy in Firefox:
- Open Firefox web browser on your computer.
- Click on the three parallel horizontal lines in the top-right corner of the window to access the menu.
- From the drop-down menu, click on "Options." This will open the Firefox settings page.
- In the left-hand sidebar of the settings page, click on "General" to view the general preferences.
- Scroll down until you find the "Network Settings" section. Here, click on the "Settings" button.
- In the Connection Settings window that appears, choose the "Manual proxy configuration" option.
- Enter the IP address or hostname of the proxy server you want to use in the "HTTP Proxy" field.
- Specify the port number for the proxy server in the adjacent "Port" field.
- If your proxy server requires authentication, check the box next to "Use this proxy server for all protocols" and enter your username and password in their respective fields.
- You can also specify proxy settings for specific websites by entering their addresses in the "No Proxy For" field, separated by commas.
- Once you have entered the necessary information, click the "OK" button to save the proxy settings.
- Close the settings window and start using the Firefox browser. Any internet traffic from Firefox will now be routed through the chosen proxy server.
Remember that using a proxy does not provide foolproof anonymity, and your online activities can still be tracked in certain circumstances. It's also important to use trusted and secure proxies to ensure the privacy and security of your internet connection.
How to enable or disable proxy DNS in Firefox?
To enable or disable proxy DNS in Firefox, you can follow these steps:
- Open Firefox and click on the menu button (three horizontal lines) in the top-right corner.
- From the dropdown menu, click on "Options" (or "Preferences" on macOS).
- In the options/preferences page, go to the "General" tab.
- Scroll down to the "Network Settings" section and click on the "Settings" button.
- In the connection settings window, select the "Automatic proxy configuration URL" option if you want to enable proxy DNS or select "No proxy" option if you want to disable it.
- If you choose the "Automatic proxy configuration URL" option, enter the URL of the proxy configuration script provided by your network administrator.
- Click on "OK" to save the changes and close the settings window.
- Restart Firefox for the changes to take effect.
Note: Proxy DNS settings can also be managed through profiles or by modifying the about:config settings in Firefox.
How to check if a proxy is working in Firefox?
To check if a proxy is working in Firefox, follow these steps:
- Open Firefox and click on the menu button (three horizontal lines) in the top-right corner of the browser window.
- From the menu, select "Options" or "Preferences."
- In the Options or Preferences tab, select the "General" or "Advanced" settings.
- Scroll down to the "Network Settings" section.
- Click on the "Settings" button next to the "Connection" category.
Option 1: Automatic Proxy Configuration URL
- If you are using an automatic proxy configuration file (PAC URL), select the "Automatic proxy configuration URL" option.
- Ensure that the PAC URL is correctly entered in the field.
- Click on the "Reload" button to reload the PAC file. If it reloads successfully, the proxy configuration is likely working.
Option 2: Manual proxy settings
- If you are manually configuring the proxy, choose the "Manual proxy configuration" option.
- Enter the proxy server IP address and port number in the respective fields.
- Check the "Use this proxy server for all protocols" box.
- Click on the "OK" button to save the changes.
- Visit a website to see if you are able to access it. If the website loads and functions properly, the proxy is working.
Note: It is also worth mentioning that there are various online proxy checking tools available that can help verify if a proxy is working by testing its connectivity and responsiveness.
How to set up a proxy auto-config (PAC) file in Firefox?
To set up a proxy auto-config (PAC) file in Firefox, follow these steps:
- Open Firefox and click on the menu button (three horizontal lines) at the top-right corner of the window.
- From the dropdown menu, select "Options".
- In the Options tab, click on the "General" panel on the left-hand side.
- Scroll down until you find the "Network Settings" section. Click on the "Settings" button next to the "Configure Proxy Access to the Internet" option.
- In the "Connection Settings" window that opens, select the "Automatic proxy configuration URL" radio button.
- In the URL field, enter the URL of the PAC file. This is typically a web address that ends with ".pac".
- After entering the PAC file URL, click on the "OK" button to save the settings.
Firefox will now use the PAC file to determine how to access the internet through proxy settings specified in the file.
What are the benefits of using a proxy server in Firefox?
There are several benefits of using a proxy server in Firefox:
- Anonymity: Proxy servers can mask your IP address, making it difficult for websites to track your online activities. This enhances your anonymity and privacy.
- Bypassing restrictions: Proxy servers allow you to bypass network or geographical restrictions. By routing your traffic through a server located in a different region, you can access content that may be blocked or restricted in your location.
- Improved security: Proxy servers act as an additional layer of security between your device and the websites you visit. They can filter out malicious content, block ads or pop-ups, and prevent potentially harmful scripts from executing on your computer.
- Faster browsing: In some cases, proxy servers can help speed up your browsing experience. By caching frequently accessed web pages or compressing data, they can reduce bandwidth usage, leading to faster loading times.
- Content filtering: Proxy servers can be configured to filter certain types of content, such as malware, adult content, or specific websites. This can be useful for organizations or individuals who want to prevent access to inappropriate or potentially harmful websites.
- Traffic management: Proxy servers can manage network traffic by distributing it across multiple servers, balancing the load and improving overall performance. This can be especially beneficial for companies with high traffic websites or those dealing with a large number of users.
- Testing and debugging: Web developers often use proxy servers to test and debug their websites. By intercepting and inspecting network traffic, they can identify and troubleshoot issues related to the website's performance or functionality.
It's important to note that while proxy servers offer these benefits, they may also introduce certain risks, such as the potential for the proxy server operator to monitor or access your data. Therefore, it's recommended to use trusted and reputable proxy servers, especially when it comes to handling sensitive information.
How to block certain websites with a proxy in Firefox?
To block certain websites with a proxy in Firefox, follow these steps:
- Open Firefox and click on the menu icon (three horizontal lines) at the top right corner of the browser window.
- From the drop-down menu, select "Options."
- In the Options tab, click on "General" from the left sidebar.
- Scroll down to the "Network Settings" section and click on the "Settings" button.
- In the Connection Settings window, select the option "Manual proxy configuration."
- Under the "HTTP Proxy" field, enter the IP address or hostname of the proxy server you want to use. In the "Port" field, enter the port number.
- Below the HTTP Proxy fields, there is a box titled "No Proxy for." In this box, enter a list of websites or domain names that you want to block.
- Click "OK" to save the settings and close the Connection Settings window.
That's it! With these settings, the specified websites will be blocked when you use the proxy server in Firefox.